Animated collage
Introduction/Overview
Once students have created their own collage in p5.js, they will learn to animate the images they have imported into their collage to create a dynamic and interactive art piece.
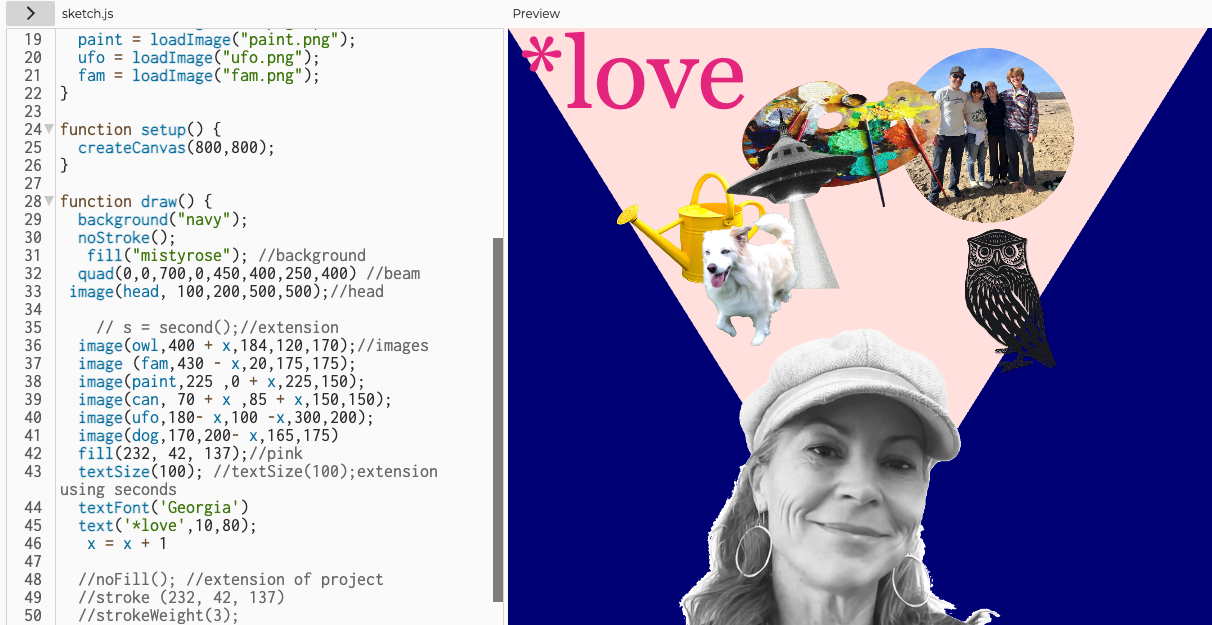
Example completed sketches: Collage Mover
Learning Audience
This lesson is intended for those students who have created a collage in p5.js based on the instructions given at Instructional Art. For additional frontloading context, invite students to create analog collages prior to this class. Digital versions using the collage method are also helpful.
Established Goals
Meets California Computer Science Standards: 3-5.AP.13, AP.14, AP.17,
Objectives
- Students will understand that computer programming involves a series of small, explicit steps written in code using the p5.js editor.
- Students will use their knowledge of graphic design to create a compelling background with the imagery they have collected for their digital collage.
- Students will build upon a previously coded collage to animate images.
- Students will become more comfortable with writing in Javascript syntax: finding, debugging and writing brackets, declaring variables, using brackets vs. parenthesis, ending statements with semicolons, and functions.
Technical Terms & P5JS Elements
- Elements
- Function draw
- loadImage
- Vocab
- Algorithm (A list of steps that you can follow to finish a task.)
Visual Arts Vocabulary
- Analog v Digital collage
- Layers
External References & Resources:
- Lotte Reiniger, Mary’s Birthday
- Nati Golan animated collage, Moon City
- Zavat animated collage, El Sueno
Timeline
45 min-hour
Overview
Class Discussion: Introduce the idea that the function draw code is like the pages in a flipbook, in that it creates a sequence of drawings that change slightly at a timed interval.
Student Activity: Students will assign variables and expressions to their collage to animate the location of their images.
Learning Plan
Materials
- Projection screen
- Computer (with browser)
- Paper and pencil
Introduction
Whether the function draw contains 10 lines or 10,000 lines of code, each line will run (be executed) in the order it’s written until the closing bracket is reached. Then the process begins again from the top line and runs repeatedly until we stop our code from running (about 60 times a second).
We can think of the function draw command code like the pages in a flipbook, in that it creates a sequence of drawings that change slightly at a timed interval and if we use a math expression, then the values we assign to variables will change.
Demo animated collage artist works (see above in the external resources panel) and link to teacher collage example.
Activity
- Have students open up their collaged works.
- Demonstrate how to create a variable outside and above of the function draw command.
- Demonstrate how to add that variable to the x coordinate in an image.
- Direct students to write a math expression x = x + 5 within the function draw bracket.
- Have students experiment with different numbers other than 5. Ask “What do you notice happening”?
- Next, have students add the variable to other coordinates (x and y) and images. Challenge students to make an image move to the left or up.
- Demonstrate what commenting out (“//”) the background does to the collage.
Wrap up
Discuss the 4 steps to animation:
- Design (with shapes, images, backgrounds, colors and text)
- Declare Variables (above function draw or in function setup).
- Apply variables to your Design (with “+”, “-”, or “*”)
- Create a math expression (in the variable, inside the function draw, ex y = y - 3 or x = x + 5))
Challenge Options for early finishers
- Challenge students to animate all the images of their collage or change the color of the background.
Review/Remediation
- Have students begin with a single background and a single shape (like a rectangle) and complete the 4 part process as outlined above
- Have ready a typed out code that students can copy onto their own sketch and change.
Assessment & Checking for Understanding
- Class Discussion Questions
- Did your images move in the direction you predicted when you assigned a variable?
- What helped you figure out the direction of movement of your images?
- What could you code to change the rate of movement among your images (ie make one image move faster or slower than the others)?
- Teacher observation of student progress during activity.
- Student animation program
Next steps
Introducing conditional statements so that the images do not move off of the canvas.