Mask Generator
Lesson Plans & Technical Steps
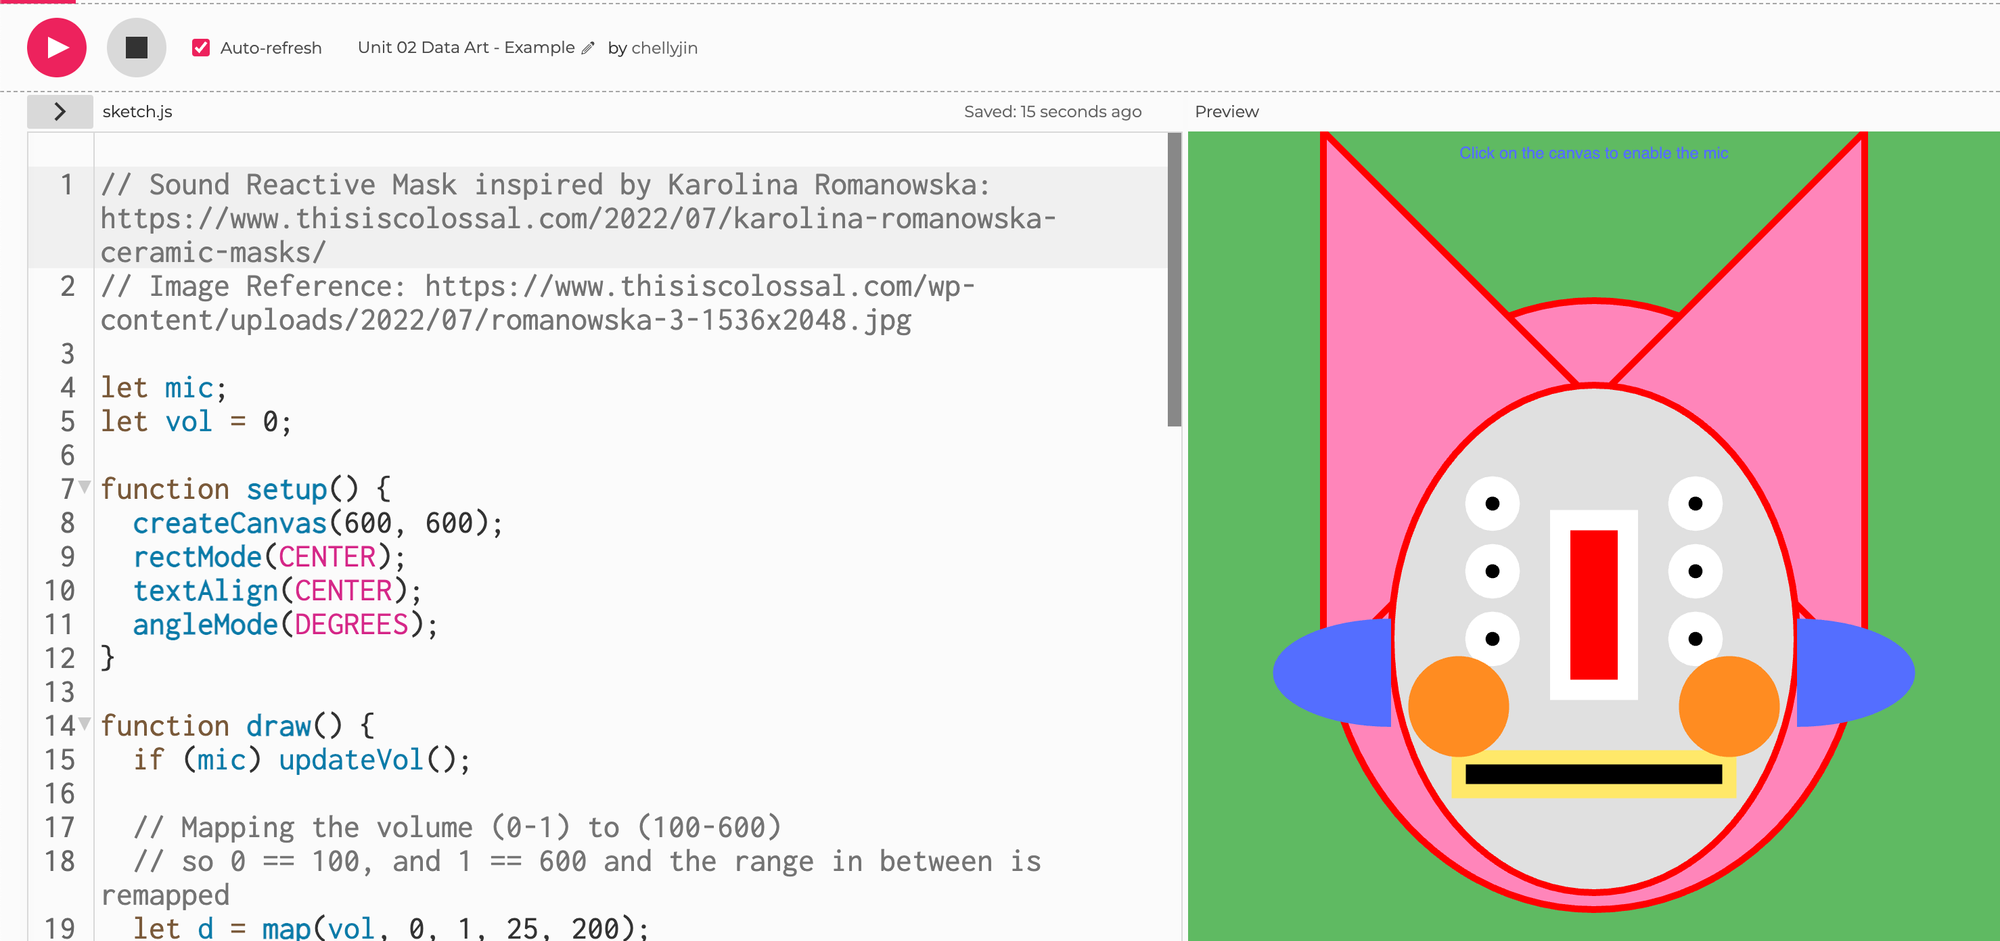
Let’s make — Sound-reactive Mask!
🔗 Template link here: https://editor.p5js.org/chellyjin/sketches/D10NZG0tW
🖼️ Example Link here: https://editor.p5js.org/chellyjin/sketches/NDZxQRSia
What we need to begin
- Computer with p5.js on web browser (Google Chrome)
- Microphone (Built in or External)
The Lessons
⏰ Each of the 2 lessons will take approximately 20-25 minutes
🔗 Template link here: https://editor.p5js.org/chellyjin/sketches/D10NZG0tW
Vocabulary
- Variables
- Special Variables
Lesson Plan 1: Introducing Variables
What is a Variable?
- A variable stores a value in memory so that it can be used later in a program.
- A variable can be used many times within a single program, and the value is easily changed while the program is running.
- The primary reason we use variables is to avoid repeating ourselves in the code.
How to make a Variable
Step 1: Declare
- You can name variables anything you’d like
- “Let” declares and initializes the variables
🧠Teacher Trick: Think of yourself as creating a new world, declaring aloud let there be light! By declaring with “let”, we’re proclaiming something (a variable) into existence in our world of code.
Step 2: Assign a value
- “=” assigns a value. When we say let y = 60 we’re saying now there is a y and it holds the value 60.
Step 3: Use it!
- And then we can use y anywhere in lieu of 60!
Special Variables
These are existing variables, initialized and defined by the programmers who made p5.js following a convention. They make our lives a little easier and can do cool things, for example:
- mouseX, mouseY;
- use mouse to control position of ellipse
- use mouse to control scale
- use mouse to control color
- create a simple drawing program
- windowWidth, windowHeight, width, height, img.width, img.height
- Indicated by the pink color in code.
mouseX + mouse Y
function setup() {

	createCanvas(600, 400);

	fill(0, 102);

	noStroke();

}

function draw() {

	background(mouseY); // background color changes based on mouseY

	ellipse(300, 200, mouseX, 50); // width changes based on mouseX

	ellipse(mouseX, mouseY, 10, 10); // ellipse follows mouse

}
width and height
function setup() {
	createCanvas(480, 120);
}

function draw() {
	background(204);
  line(0, 0, width, height);  // Line from (0,0) to (480, 120)
  line(width, 0, 0, height);  // Line from (480, 0) to (0, 120) ellipse(width/2, height/2, 60, 60);
}
console.log()
There is a cool function called console.log() in p5.js which is great to use for debugging your code. Console.log() can be used in a variety of ways, from adding it to places to check if the code you’ve written is working as you intended, or in this case, to see what is stored inside a variable!
Learning about our Special Variables, try putting them into Console.log to see what happens?
function setup() {

	createCanvas(600, 400);

	fill(0, 102);

	noStroke();

}

function draw() {

	background(mouseY); // background color changes based on mouseY

	ellipse(300, 200, mouseX, 50); // width changes based on mouseX

	ellipse(mouseX, mouseY, 10, 10); // ellipse follows mouse

	console.log(mouseX, mouseY);

}
Below your code, is a grey box called the “Console” — after pressing Play, you should see number appear. Can you figure out what the numbers are?
-
🙋🏻♀️ Answer
It’s the coordinates of your Mouse position! It’s telling us where our cursor is in the canvas’ space.
Now, we can clearly and plainly see that mouseX and mouseY are storing and rewriting new values of data based on where you mouse position is. Data isn’t just a spreadsheet, but “the quantities, characters, or symbols on which operations are performed by a computer, being stored and transmitted in the form of electrical signals and recorded on magnetic, optical, or mechanical recording media,” (definition from Oxford Language Dictionary).
We can understand data more expansively, and see how using variables is storing information and then enabling us to utilize it in artistic, creative ways.
Lesson Plan 2: What you can do with Variables
Prompt: Why might creating a variable be helpful, valuable or efficient?
Repeatability
I want to make 3 ellipses
function setup() {

	createCanvas(600, 600);

}

function draw() {

	ellipse(75, 60, 80, 80);   // left

	ellipse(175, 60, 80, 80);  // middle

	ellipse(275, 60, 80, 80);  // right

}
But do you see all those redundant numbers?
Instead of having to repeat the same number over and over again, I can store numbers that will always continue to be the same value as one variable:
let y = 60; // 100

let d = 80; // 130

function setup() {

	createCanvas(600, 600);

}

function draw() {

	ellipse(75, y, d, d);   // left

	ellipse(175, y, d, d);  // middle

	ellipse(275, y, d, d);  // right

}
In the example above, I’ve made:
- let y = 60; a variable called “y” to represent the y-coordinate value I want all my circles to be in (so they’re on a straight line!) at 60px from the top
- let d = 80; is a variable representing my diameter — how big I want the circles to be. Because I want all my circles the same size.
Now, remember, we can name these whatever we’d like: call it apple, oranges, we can even call it X but use it for the values of Y!
BUT, it’s really in the best interest for your future self, as well as good coding hygiene for future sharing with other coders, to name your variables as self-descriptive names. You can certainly name them however you’d like but making it easier for yourself to debug later is always a good practice.
Also, using variables makes it super easy to make changes for later.
Instead of having to rewrite all new values, I can simply change the value at the top and the change will trickle throughout:
let y = 60; // 100 or change it to whatever value or size you want!

let d = 80; // 130 or change it to whatever value or size you want!

function setup() {

	createCanvas(600, 600);

}

function draw() {

	ellipse(75, y, d, d);   // left

	ellipse(175, y, d, d);  // middle

	ellipse(275, y, d, d);  // right

}
Arithmetic
Add arithmetic to your variables!
- variable arithmetic (you can modify variables)
- order of operations (), * /, + -
- +=, ++, –
- You can use this to make increments of your variables, animate your elements, and so much more!
Let’s revisit our 3 circles:
let y = 60; // 100

let d = 80; // 130

function setup() {

	createCanvas(600, 600);

}

function draw() {

	ellipse(75, y, d, d);   // left

	ellipse(175, y, d, d);  // middle

	ellipse(275, y, d, d);  // right

}
If you notice, each of the circle’s X value is following some kind of an increment. It’s adding 100px every time!
We can utilize the power of variables WITH arithmetic to make it easier for us.
let x = 75; // where we want the first circle's X to start

let y = 60; // 100

let d = 80; // 130

function setup() {

	createCanvas(600, 600);

}

function draw() {

	ellipse(x, y, d, d);   // left

	ellipse(x+100, y, d, d);  // middle

	ellipse(x+200, y, d, d);  // right

}
OR we can even modify it further. How would you go about it?
-
Answer
There are SO many ways you can answer this question actually, and there is no right or wrong way. Here is one example of how I might streamline this so I can make iterations or easy changes in the future:
  let x = 75; // where we want the first circle's X to start

  let y = 60; // 100

  let d = 80; // 130

  let s = 20; // the spacing between each circle

  function setup() {

  	createCanvas(600, 600);

  }

  function draw() {

  	ellipse(x, y, d, d);   // x = 75, which is the same

  	ellipse(x + (d+s), y, d, d);  // now, we're adding the d (our circle's diameter, so they don't overlap)
  																// +s, which adds 20px gap so the circle's aren't touching

  	ellipse(x + (2*(d+s)), y, d, d);  // and then multipled by 2 so it keeps the same distance + width

  	ellipse(x + (3*(d+s)), y, d, d); // and then we make it super easy for our future selves

  	ellipse(x + (4*(d+s)), y, d, d);
  }
let x = 25;
let h = 20;
let y = 25;
function setup() {
  createCanvas(480, 120);
}
function draw() {
  background(204);
  rect(x, y, 300, h);        // Top
  x = x + 100;
  rect(x, y + h, 300, h);    // Middle
  x = x - 250;
  rect(x, y + h*2, 300, h);  // Bottom
}
Updating a value
We can also update the value of a variable throughout our code. It can mean one value in a specific context, and then change its value in another.
- Replacing the value of a variable
- Variables can update themselves with new information - ie. x = x+1; This means that x will keep updating to add 1 to itself.
- If using “let,” we can change the variable type. The same variable used for storing numbers can also update to be text or array of values.
🎨 In our Sound-Reactive Mask example:
- One way we can check what is stored inside the variable is to use : console.log. Try using consloe.log for the variable “vol” to see the values that come from the microphone input!