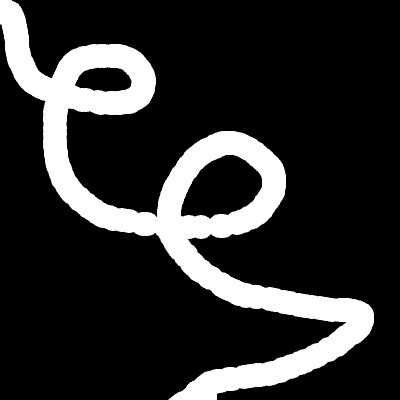
Drawing Machine
Making Your Own Paintbrush Tool
This is the code for a simple drawing tool that paints a trail of white ellipses across a black canvas, following the cursor as it moves across the screen. The computer will draw an ellipse (60 frames per second) wherever the mouse cursor’s x and y position is.
function setup() {
  createCanvas(400, 400);
  background(0);
}

function draw() {
  noStroke();
  fill(255);
  circle(mouseX, mouseY, 24);
}
But what if I wanted to create multiple types of brushes where some change colors or draw with a shape other than an ellipse? We will need to create separate functions for each brush we make.
How to Make a Custom Paintbrushes
This program lets you paint on the canvas using different types of digital brushes. You can switch brushes by pressing keys on your keyboard.
Let’s make a purple brush that grows the longer you hold it down.
function purpleBrush() {
  if (mouseIsPressed) {
    noStroke();
    fill(154, 66, 211, 100); // r,g,b,a
    ellipse(mouseX, mouseY, brushSize, brushSize);
    brushSize = brushSize + 0.3; // this makes the brush size grow every frame
  } else {
    brushSize = 10;
  }
}
If you run this code as is, nothing will happen. We’ve told the computer how to make the brush, but we haven’t told it to use it yet. Think of it as if we gave the computer a paintbrush but we haven’t commanded it to start painting with it yet.
We must “call” the function in the draw() loop for the paintbrush to work.
let brushSize = 10;

function setup() {
  createCanvas(400, 400);
  background(220);
}

function draw() {
  purpleBrush(); // this "calls" the function
}

function purpleBrush() {
  if (mouseIsPressed) {
    // brush 1
    noStroke();
    fill(154, 66, 211, 100); // r,g,b,a
    ellipse(mouseX, mouseY, brushSize, brushSize);
    brushSize = brushSize + 0.3;
  } else {
    brushSize = 10;
  }
}
Let’s Make Another Brush!
Now make another brush that does the same thing, but uses a different color or shape this time.
- Name your function. Use a name you can remember and use “camel case” (e.g. firstSecondThirdWord)
- Use
if (mouseIsPressed){}to tell your program to paint when the mouse is pressed. - Customize your brush
How to Use Multiple Brushes
One way to switch brushes is by simply calling the brush you want to use in the draw() function.
function draw() {
  tealBrush(); // this "calls" the function
}
But you’d have to do some copy and pasting in the code to keep switching brushes. How might we make this more user friendly for someone who wants to use our software? We will need some way to trigger using one brush instead of the other. We can do this easily with some key triggers.
Let’s say we want the number 1 on my keypad to trigger using my purple brush and the number 2 on my keypad to trigger using my teal brush.
We will need a variable to store and track which key is pressed. Then, in the draw() function, we’ll need a conditional statement to see if number 1 or 2 was pressed. If 1 was pressed, use the purple brush. Otherwise (else if) if 2 was pressed, use the teal brush.
Make a new variable at the top of your code called brushTracker.
let brushTracker = 1; //start with purple brush
Then, use the p5.js keyPressed function to assign the variable brushTracker a 1 if 1 is pressed and 2 if 2 is pressed.
function keyPressed() {
  if (key == 1) {
    brushTracker = 1;
  } else if (key == 2) {
    brushTracker = 2;
  }
}
Now, in the draw() function, we can ask if the brushTracker is 1, then use purple brush. Otherwise, if it’s 2, use the teal brush.
function draw() {
  if (brushTracker == 1) {
    purpleBrush();
  } else if (brushTracker == 2) {
    tealBrush();
  }
}
If your code isn’t working, try using
console.log(brushTracker)
Challenge When you make your own tool, you don’t have to apply to the laws of physics or light. You can create a brush with any shape, image, or color you’ve learned about so far. Use the reference to get new ideas.
